

Today, we installed the CHU setup for the first time and we did some calibration tests. You can find Here a description of this setup.
The first installation and tests consisted in :
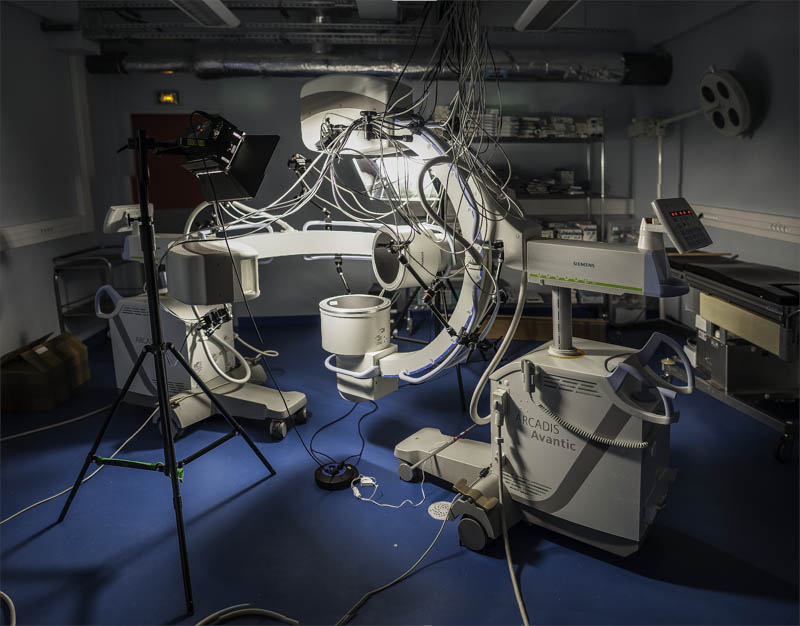
- finding the good space configuration for the X-ray C-Arms
- routing the alimentation/synchronisation cables from the workspace to the acquisition room
- puting the 8 color cameras of the 4D View Solutions multi-camera system at the right place on the C-Arms handle bars
- puting the lights at the right places
- calibrating the multi-cameras system
- performing an acquisition of a coloured lead ball with the multi-camera system and the 2 X-ray C-Arms simultaneously (in order to calibrate the pose of the virtual X-ray cameras positions relative to the multi-camera system)
You can see hereunder the setup after the installation. We used here two fluorescent tube lights. It is a bit tight, particularly for the lower part of the objects, but we will install more later :
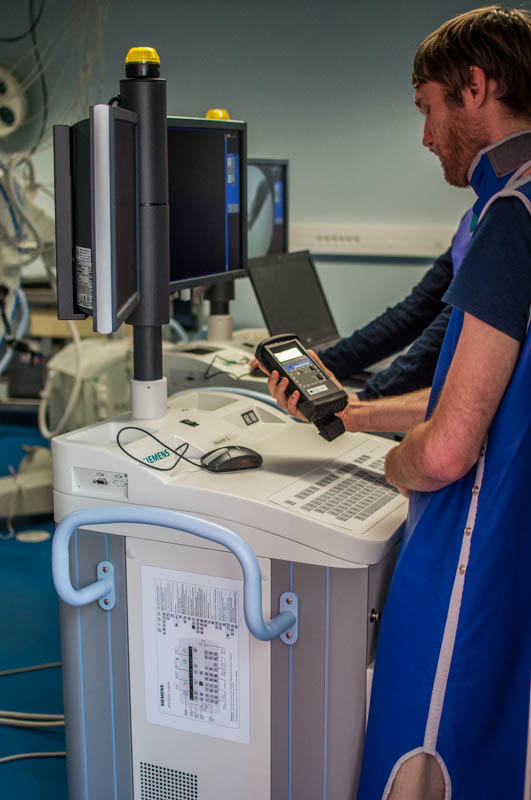
We measured the radiations all around the room and out of the room (surrounded by lead walls) in several points while using the X-Ray devices. All the radiation measurements were below the french norm. We use lead protection clothes into the room during the acquisitions :
This photos shows the calibration process of the X-Ray virtual cameras external parameters relative to the multi-camera setup, using a coloured lead ball :
